Showing posts with label Dessert recipes. Show all posts

October 18, 2016

Pear & Apple Autumn Oat Crisp - Gluten Free

I made a dessert for our family meal Sunday.  
I love making Crisps and Crumbles and this time of year 
is always great for finding fresh apples and pears to use in such things.

I bought this book some time ago at Barnes and Noble in the sale racks.  I think I paid about $8.00 for it and it is fabulous!  If you are looking for a good Gluten Free baking book this is a great choice.  It uses basic ingredients for all the recipes so you don't have to have more than a gluten free flour instead of wheat flour.  It is super easy to find gluten free flour these days, too.  I used the Bob's Red Mill Cup4Cup GF flour for this one.  It also has a section in the front with how to make your own blends.


This is the one I chose to do yesterday and I used Bob's Red Mill GF Oats and Cup4Cup Flour.  Anywhere you are told to use a cornstarch you can also use a tapioca starch/flour instead.


So, here is his list of ingredients...


and his instructions...


and here is how I changed it.... 
because I change stuff all the time based on what I have on hand and what I can eat.  LOL

My recipe was doubled from what he made.

5 Bartlett Pears 
4 Granny Smith apples 
peeled and chopped 
and then tossed in sugar (about 1/2 cup to 3/4 cup, 
cinnamon (maybe 1 tsp or a little more if you like),
tapioca starch (1 to 2 TBSP depending on how thick you like the juices)
You could also add some cardamom instead of cinnamon... I think it is really nice in fruit desserts 
you could also add some dried or fresh cranberries or blueberries if you want.

The topping is made from 
 1 cup of GF flour 
1 1/2 cup GF oats 
 1/2 cup chopped pecans, 
a pinch of salt, 
1/2 cup coconut oil instead of butter for my fat.

I did not put any of the oats on the bottom and my dish is well seasoned so it needed no oil to keep it from sticking.


This is how it turned out... a great Autumn dessert for a Sunday dinner occasion or anytime, really.


He has a few videos on YouTube, too

October 03, 2016

Food Memories - My very favorite pie!

I grew up an oil brat.  My Daddy moved us about every 18 months to 3 years until I was in middle school.  We rarely spent big holidays at home.  My Dad's parents had long since passed away but my Mom's parents were still living and made their home in Homer, Louisiana for the duration of my childhood.  We went to my grandparents home on my Mom's side for most of the big holidays like Thanksgiving and Christmas until my Meemaw passed away when I was 21 years old.  I also spent lots of time in the summers with her in my time off from school. It was a place that acted as an anchor for me in the midst of all the change we had with my father's job.  It was a familiar cozy lovely nourishing place to be for me.  

Meemaw rarely shook things up when she cooked for us.  We loved the familiarity of her meals. She always said that she would make something different if we wanted it but we never wanted that.  There was just something very comforting in those same meals each time we went.

We had black-eyed peas made with salt pork or bacon and onion with just about every meal.  She would slow cook them all day and the whole house smelled heavenly!  We also had roasted chicken and cornbread dressing for big meals with vegetable sides.  Holiday and Sunday meals were very similar to each other.  We rarely deviated from that tradition.  I don't even think I ate turkey for Thanksgiving until I was in my teens.  My Dad and my Meemaw preferred chicken and no one else minded or complained.

She also kept things on hand such as homemade plum jelly that she or a friend would make each summer.  She kept hamburger buns stocked for toasting in the little toaster oven.  She would slather them with butter and pop them in to get a golden crunchy top to them.  There were always homemade biscuits stashed in the freezer.  She would put them on a tray in the oven at a moments notice.  She might do that 3 or 4 times in a morning as we would straggle out of bed one at a time and work our way to the kitchen.  She always had fresh coffee and as a young girl I would have a little of that coffee with my milk and sugar in my own special mug.  

Her pantry held things like peanut butter to go with that plum jelly for lunch or a snack.  She kept small single bags of Fritos to go with our sandwiches.  Fritos are still my favorite!  There were little 8 ounce cokes in glass bottles chilling in the refrigerator.  She kept several little snack items on hand but the one I remember most were the Honey Buns.  I loved it all... she never made anything that I did not love.  

There was one thing, though, that was and will remain my most favorite thing she ever made.... her BUTTERMILK PIE!  She was a master pie maker and did do many different kinds over the years but that Buttermilk was always the one we asked for first.  It is a pie that many people today don't make anymore.  It is rich and sweet and it does not take much to satisfy the craving.  It is fantastic with a cup of your favorite coffee.  

Here is the recipe I pulled from her stacks after she passed away.  I have kept all of her handwritten and clipped recipes but this one gets the most use to this day.  Second most used is probably her cornbread or ice cream recipes.  


Meemaw's Buttermilk Pie

You need:
1 (9-10 inch) unbaked pie shell
1/2 cup butter or margarine (I only use butter unsalted)
2 cups sugar
3 slightly rounded Tbsp. flour
3 eggs, beaten
1 cup buttermilk
1 tsp. vanilla

Cream margarine of butter and sugar. Add flour and eggs; beat well. Stir in buttermilk and vanilla. Pour into unbaked pie shell and bake 45 to 50 minutes at 350*. Cool completely on wire rack before cutting and serving.


Want a list of other pies people don't make much anymore?  Here are some articles I found about Retro Pies


August 09, 2012

Quick Snicker Bar Pie...

I do everything from scratch but if you do not want to here is a quick no bake recipe...

You will need:

A Graham Cracker Crust


A Jar of Caramel Sauce


A Jar of salted or unsalted peanuts... your choice


A family size box of Chocolate Pudding/Pie Filling (Instant... just add milk).  Follow the directions on the box for the pie filling.  Make it ups and have it ready to layer into the pie once the caramel and peanuts are in.


Whipping Cream (if you make your own then you will need powdered sugar and vanilla extract to sweeten as you whip it) or Whipped Topping


A Snicker Bar cut into little bits


 Sprinkle the Snicker bits on top and refrigerate


The longer you let it chill the less gooey it will be when you cut and serve it.  


I am fine with gooey, though...  LOL

It is quick and no bake and can be assembled in just a few minutes once the pudding is made and candy is cut up.

If you want to do it from scratch then it takes a little longer but I love the flavors.

I make a graham cracker crust
homemade caramel sauce without cornsyrup
use unsalted peanuts and make a chocolate pastry cream when I have time.
The whipping cream just takes a few minutes to set up and then you layer and refrigerate for a few hours.

Let me know if you try my pie and how it turns out.  I would love to hear your feedback!  :)


November 19, 2011

Let the baking begin!


My standard traditional pie shell

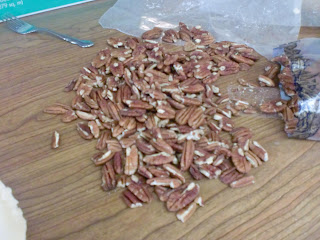
Pecans from Costco... I sometimes also use walnuts


Before the baking...

Fully baked and setting.  Nice... no runny in this one.  

Have I ever mentioned that baking pies is my favorite?  Well, I also enjoy baking bread.

I wonder if there is room in the world for a pie and bread shop?  LOL

July 20, 2011

Monster Cookies... Leann's version


There are a plethora of monster cookie recipe floating around out there but, being the personality that I am, I cannot follow their recipes to the letter.  I must make changes.  So, with that in mind here is what I do for my kiddos...

I take the basic oatmeal cookie recipe from Betty Crocker's Giant Red Cookbook I got when I first got married (BTW, the cheese pizza recipe in that thing is the BEST!!!) and I tweak it.

the basic is...

1/2 cup granulated sugar
1/2 cup packed brown sugar
1/4 cup butter (softened)
1/4 cup shortening (if you don't have shortening... which I sometimes don't... then I just double the butter and it gives a little different texture but they are still delish)
1/2 tsp baking soda
1/2 tsp vanilla
1/4 tsp baking powder
1/4 tsp salt
1 large egg
1 1/2 cups oats (I use old fashioned but the recipe calls for quick cooking... if you put old fashioned in a food processor and pulse a few times they become quick cooking.... just so you know)
1 cup all purpose flour
1 cup chopped pecans or walnuts (typically whatever I have on hand at the moment)

The recipe has raisins but I leave those out (when I make it sometimes I use craisins instead, too)

The recipe is one where you cream the butter/shortening and sugars together then add the egg.  In a separate bowl sift all the dry ingredients and then mix the two together... add the oats and nuts and there ya have it.

I double the recipe then...

To that I add:

1/2 cup mini M&M candies
1/2 cup mini Reeses Peanut Butter Cups
1/3 cup chocolate chips (I use semi-sweet)
1/2 cup Reeses Pieces
1/3 cup white chocolate or peanut butter chips (again... whatever is on hand)


I use a small ice cream or cookie scoop to place them on parchment on a baking sheet and then bake them for about 12 minutes or until done at 375 degrees.


They are quite chunky and gooey and yummy!!!  They freeze beautifully for lunches so you can make a giant batch and then bag them two by two for the kids school lunchboxes.

There will be a picture attached as soon as I make them this week... maybe tonight maybe tomorrow... I promise!  :)

July 03, 2010

Simple Summer Pie...

When I was a little girl my Meemaw made several things that were standards with us.  In the summer she had two "go to" pies for those hot Louisiana days when we were there for a visit.  She made Peanut Butter Pie and Lemonade Pie.  They are both refrigerator pies and great on a hot day. 

The Lemonade Pie could be either a yellow or a pink lemonade pie.  Here is the simple recipe that she would follow. 

1 6 ounce can frozen lemonade concentrate
1 can sweetened condensed milk
1 10 ounce tub of whipped cream (or make your own whipped cream from whipping cream, vanilla and powdered sugar)

Mix all the ingredients together and pour into a graham cracker crust.  Refrigerate for a few hours before serving.  This pie freezes well for future use, too.  :)

Crust:
1 cup plus 1 tablespoon (5ounces) graham cracker crumbs
1/4 cup granulated sugar
1/4 cup melted butter

Mix ingredients, press into pie pan and bake for about 10 minutes at 350 degrees and then let it cool before filling.

We made this pie...
You could add lemon slices to decorate if you like but this is the plain and simple version.  It is very rich and very cold and very yum!  :)


February 26, 2010

Pumpkin Pudding in the Crock Pot

This recipe is FANTASTIC and it is from my friend Carrie Lynn Baird.  She self published a cookbook called 30 Days In a Crockpot:  Recipes for the Crockpot when it's all you got!  She quickly tells you the story of how the book came about and then shares 30 of the best crock pot recipes I have ever seen.  I will share one with you here and if you are interested in ordering her book you can e-mail her here to request one and she will give you details on how to obtain it.  It is inexpensive and a valuable resource. 

Here is the recipe we made today...

Pumpkin Pudding

1 large can pumpkin pie filling
2 tsp vanilla
1 large can evaporated milk
1 cup brown sugar packed
1 cup biscuit mix (I make my own but store bought is perfect for this)
4 Tbsp butter
3 eggs
chopped pecans if desired

Spray crockpot with cooking spray coating sides and bottom well
Combine all ingredients except pecans in a mixing bowl
Beat well with a mixer until smooth
Pour in the crockpot
Sprinkle the chopped pecans on top
Cover and cook on low for 6 to 8 hours (mine only took 4 hours and it was perfect!)
Do not peek.... leave the lid on or it will fall before it's done.

Scoop and serve with ice cream or whipped cream!  

Italic words are mine in the recipe, btw.

Here is ours...

December 24, 2009

Christmas Eve...


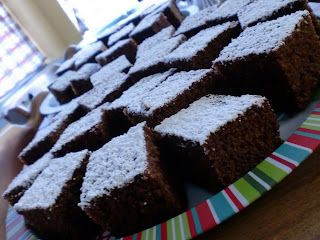
We are having a church gathering tonight and this is my contribution. I made the Sticky Gingerbread recipe from the Nigella Christmas Cookbook. It is FANTASTIC!!! Here are my results with it....


This is the US measurements version...


Sticky Gingerbread
Adapted from Nigella Christmas
1 cup plus 3 tablespoons of butter
3/4 cup dark corn syrup
3/4 cup molasses
2/3 cup packed soft dark brown sugar
2 teaspoons finely grated ginger
1 teaspoon ground ginger
1 teaspoon ground cinnamon
1/4 teaspoon ground cloves
1 teaspoon baking soda dissolved in 2 tablespoons warm water
1 cup whole milk
2 eggs, beaten to mix
2 cups all-purpose flour
Preheat the oven to 350ºF and line a roasting pan or ovenproof dish (approx. 12 x 8 x 2-inches) with aluminum foil or parchment paper (if using foil, grease it too).
In a saucepan, melt the butter over a lowish heat along with the sugar, syrup, molasses, fresh and ground gingers, cinnamon and cloves.
Take off the heat, and add the milk, eggs and dissolved baking soda in its water.
Measure the flour into a bowl and pour in the liquid ingredients, beating until well mixed. It will be a very liquid batter, so don’t worry. This is part of what makes it sticky later.
Pour it into the prepared pan and bake for 45–60 minutes until risen and firm on top. Try not to overcook, as it is nicer a little stickier, and anyway will carry on cooking as it cools.
Transfer the pan to a wire rack and let the gingerbread cool in the pan before cutting into 20 squares, or however you wish to slice it.
Optional: Combine 1 1/4 cups confectioners’ sugar with 1 tablespoon lemon juice, and one tablespoon of water. Then spread over the top of the cold slab of gingerbread. You can also add a light dusting of confectioners’ sugar.

This is SO YUM!!!  It is the second recipe I made from her book.  The first one was the Christmas Granola...


Also a TOTAL winner!!!

Ingredients:
8oz/225g rolled oats (not instant)
2oz/60g sunflower seeds
2oz/60g white sesame seeds
2 tsp ground cinnamon
½ cup runny honey
¼ cup light brown sugar
2oz/60g whole natural almonds (did not use)
2oz/60g blanched almonds (I substituted pecans because that is what I had)
½ tsp Maldon salt or pinch of table salt
1 tbsp sunflower, rapeseed or grapeseed oil (I used canola oil here)
5oz/150g (2-2 ½ cups) dried cranberries

Directions:
1. Preheat oven to 330°F/170°C.

2. Line a large shallow baking sheet (with rim) with aluminum foil

3. Mix everything except the cranberries in a large bowl. Easiest to use two spatulas to blend the sticky mixture.

4. Place the mixture on the prepared pan and spread evenly. Turn with a spatula half-way through the baking process. As Nigella says “the object is to get the granola evenly golden without toasting too much”.

5. Let it cool completely (remove the foil from the hot baking sheet) before tossing with cranberries.

Store in an airtight container.

December 17, 2009

Teacher gifts...

We worked on cookies and candies for the kids teachers yesterday. We made a cranberry pistachio biscotti, a Mexican wedding cookie and sugar cookies along with some little candies using a Wilton candy making kit. My daughter helped with the process. Here are a few pictures and a recipe for you.

Here is the biscotti. Both this cookie and the Mexican Wedding cookie recipe are from Mary Engelbreit's Cookies Cookbook: The Queen's Best Recipes. It is a great little book! :)


This was our first try at candy making and they turned out great! :)

Mexican Wedding Cookies

1 cup pecans or walnuts (about 4 ounces) chopped fine
2 cups all-purpose flour
1 cup (2 sticks) unsalted butter at room temperature
1/2 cup confectioners' sugar, plus additional sifted confectioners' sugar for coating at the end
2 teaspoons vanilla extract

1. Preheat the oven to 325 degrees F.
2. Spread the nuts on a baking sheet and toast for 10 minutes, or until lightly golden. Let the nuts cool, then finely chop. (I use a food processor for this)
3. In a medium bowl, toss the flour with the nuts and set aside.
4. In a large bowl, beat the butter and confectioners' sugar with an electric mixer until light and fluffy. Beat in the vanilla. On low speed, gradually add the flour mixture.
5. Roll tablespoonfuls of the dough into 1-inch balls and place 2 inches apart onto ungreased baking sheets. Bake for 16 minutes, or until lightly colored. Let the cookies cool on the baking sheets for 2 minutes, then roll while warm in confectioners' sugar. Place the cookies on wire racks to cool completely, then generously roll the cookies again in confectioners' sugar.

Makes 2 1/2 dozen cookies


December 06, 2009

Advent night treat for week 2...


Tonight we had some pumpkin and chocolate chip scones. (click on the link and then sub chocolate chips for craisins, take ou the orange peel and add a bit of pumpkin and there ya go) The kiddos had eggnog with theirs and I had some New Mexico Pinon Decaf Coffee with International Delights Chocolate Mint Truffle Creamer. YUM!!!

On top is some orange colored sugar, btw. I used Special Dark Chocolate Chips, too. :)

December 02, 2009

C is for Chocolate Chip Cookies

This is a little cookbook put out by the Gold Medal Flour Company. I bought a copy of this one and it's companion, The Rainbow Bakery, when I started having kiddos. They really do have some basic wonderful recipes. One of our favorites is one we made for our Sunday Advent celebration a few days ago. Thought I would share the recipe and the finished photos. :) Enjoy!


C is for Chocolate Chip Cookies

3/4 cup of granulated sugar
3/4 cup packed brown sugar
1 cup of softened margarine or butter (I use unsalted butter)
1 egg
2 1/4 cups of all-purpose flour
1 tsp of baking soda
1/2 tsp of salt
1 cup of coarsely chopped nuts (optional)
12 ounces of semisweet chocolate chips (2 cups)

1. Heat the oven to 375 degrees
2. Mix both sugars, butter and egg in a large bowl with a wooden spoon. Stir in flour, baking soda and salt (I sift it in to incorporate better and the dough will be a little stiff). Stir in nuts and chocolate chips.
3. Drop dough by rounded tablespoonfuls about 3 inches apart onto an ungreased cookie sheet.
4. Bake until light golden brown, 8-10 minutes (centers will still be soft). Let cookies cool slightly, then remove from cookie sheet with a spatula. Makes about 48 cookies.

November 07, 2009

CHOCOLATE PUMPKIN PIE

I use my basic pumpkin pie recipe here... and then I omit the nutmeg, ginger and clove but leave the cinnamon and pinch of salt.


I put 2/3 cup semisweet chocolate melted in a double boiler with 1 Tbsp butter and mix in the evap milk to the chocolate to make it easier to incorporate.


Then add it to the pumpkin mix, pour into pie crust and bake 10 minutes at 400 degrees then drop the temp to 350 for another 40 minutes. Enjoy! You could sub a gluten free pie crust and gluten free chocolate and you should be good to go. :)


October 15, 2009

Gluten free cookies...

The testing and the journey are still ongoing. The doctor and bloodwork and such are now involved and we are searching for some answers to why I feel so badly all the time. In the meantime, I am experimenting with some gluten free and found this most excellent chocolate chip cookie recipe from this book.

Here is the recipe but if you want more you need to pick up this great book. It is SO worth it. I have also made the scone recipe and some other quick bread items.

1 cup vegetable shortening (must be shortening and not butter or margarine)
1 cup granulated sugar
1/2 cup dark brown sugar
2 large eggs
1 tablespoon pure vanilla extract
2 cups plus 2 tbsp Brown Rice Flour Mix (see below for this)
1 1/2 tsp baking soda
1 teaspoon xanthan gum
1/2 tsp salt
12 ounces chocolate chips
1 cup chopped nuts (optional)

1. Preheat oven to 375 degrees F. Position rack in center of oven. Lightly grease cookie sheet with cooking spray (I actually just used parchment paper and it worked better)
2. Beat shortening and both sugars at medium speed in large bowl of electric mixer. Add eggs and vanilla; beat until fluffy.
3. Add flour, baking soda, xanthan gum, and salt; mix at medium speed until well blended. Mix in chocolate chips and nuts.


4. Drop heaping teaspoons of dough onto cookie sheet about 2 inches apart. Bake in center of oven for 8-10 minutes until light golden brown. (for convection ovens, bake at 350 degrees F using no more than three trays at a time.) Transfer to a wire rack and cool. Store in an airtight container.


Flour Mix:
6 cups brown rice flour
2 cups potato starch (not potato flour) I use potato flakes and it works nicely
1 cup tapioca flour

Mix together and use as is.

August 16, 2009

Bulk Brownie Mix...

There is no reason to buy that box of brownie mix anymore! You just mix this together and follow the individual recipe at the bottom and you are in business. You can use this at home or make gift bags for teachers, friends, or any occasion that you are looking for a simple food gift. Here is how...

start with

* 8 cups sugar
* 5 1/2 cups flour
* 2 1/2 cups cocoa
* 4 tsp. baking powder
* 2 tsp salt

Sift together the dry ingredients. Store it in an air tight container.

When you are ready to make a batch you use...

2 cups of the brownie mix from above
1/2 cup melted butter
2 eggs
1 tsp vanilla

Stir just until mixed. Spread into an 8x8 greased and floured pan and then bake at 350 degrees for between 25 and 40 minutes depending on your oven. I went a full 40 minutes on mine but if your oven cooks hot then go less.

What are you waiting for? Go bake brownies with the kids!!! :)

August 12, 2009

Why buy it when you can make it - Italian Soda

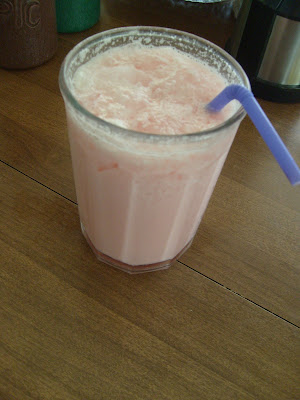
I recently had an Italian Soda at a local Italian sandwich shop. I decided that it is crazy to spend nearly $4.00 for this when I could make it for pennies at home and have one ANY time we wanted with the kids. Here is all you need...


We happened to have Twist Up but you can use Ginger Ale, 7 Up or Sprite if you want.... just something clear.
Some kind of flavored syrup of your choice. We had raspberry and vanilla and we tried one on Thursday and the other on Friday.
You also need whipping cream unwhipped to add to the beverage and then whipped cream for topping.

Put your flavoring in as much as you like between 2-5 tablespoons or so.
Add soda to fill cup almost full
then add your whipping cream... about 1/4 cup or less if so desired.
Finally, top with a dollop of whipped whipping cream.


I served ours in a chilled glass and we all got a straw to enjoy it with.